Hello Crafty Friends!
Lolly has such a fun project for us today....... combining our September Kit with a set of wooden blocks to create an awesome puzzle box. Check it out!!.......

Last month, I found a set of wooden blocks in a thrift store, and I didn't get a chance to use it, but when I saw THIS paper in the September kit, I knew it was time to dig out the blocks!

I was a few blocks short of a full set (which describes my brain, actually), but that is okay, because I wanted some blank space in the top of my puzzle box.

I held back the letters "S-E-A" to use in the project, but I had to paint the "A" so it didn't match the "E" -- now it's much better!


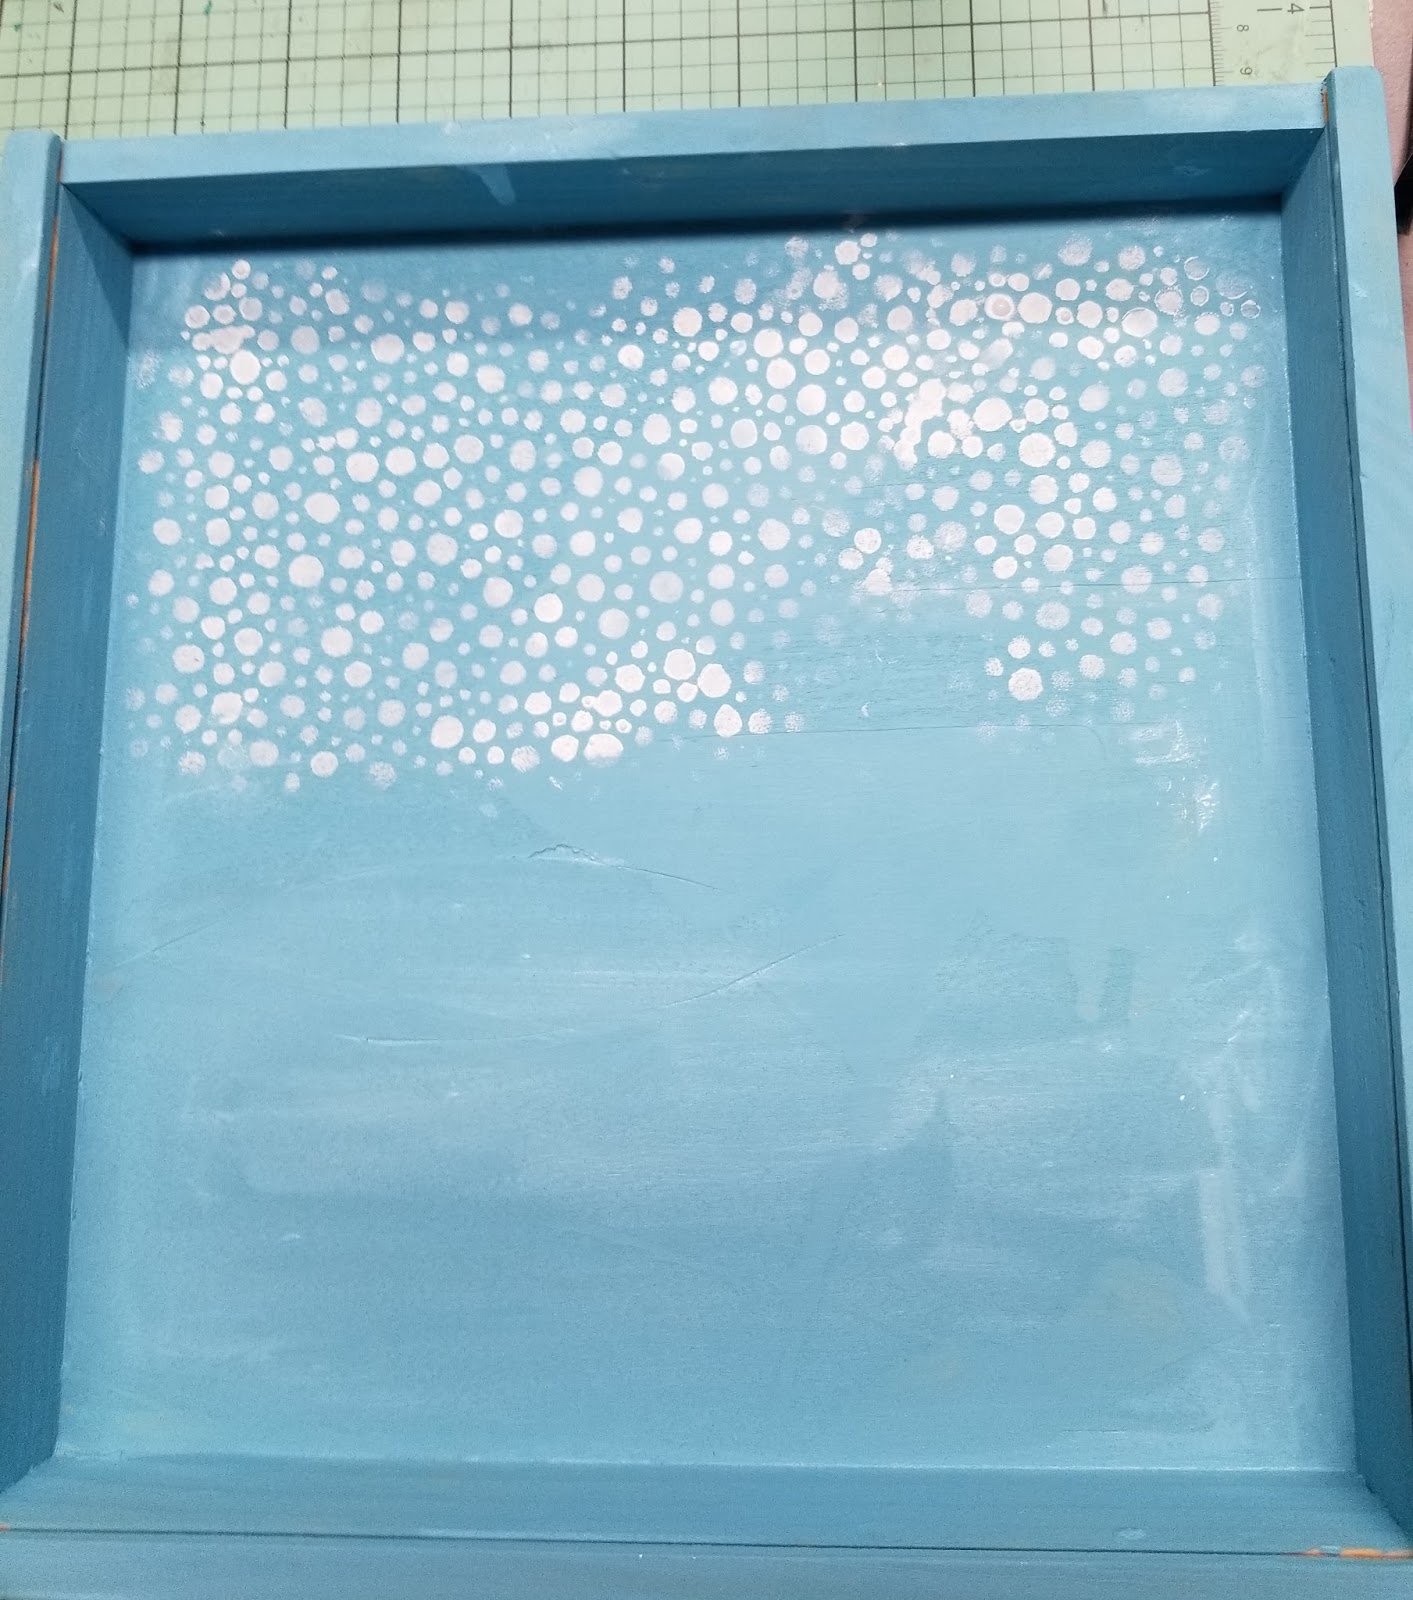
Then I painted the box one coat of a light blue acrylic paint. I wanted the wood to show through in places for a washed-out look.

I used the stencil from this kit and some white acrylic paint to sponge "bubbles" across the top of the box to add interest to the area that wouldn't have any blocks on it. I am proud of myself that I remembered to make sure that the acrylic box lid would slide in from the top of the project instead of the bottom!

Then I painted the fronts of the bottom row of blocks with black acrylic paint, and when dried I lightly sanded them to give a worn look. Then I cut a one inch strip off the bottom of the paper I'm using, and I cut that into 1" squares. There are eight blocks for each row, so I could use eight squares of the strip.

When I looked at the picture I'm using, I noticed that the bottom of the sea is black, and the top of the see is blue, so I painted my bottom row of blocks black, my top row blue, and in between I used a varying scale of mixture between the two.

I used Mod Podge to glue the paper squares onto each block, and once dry, I sealed them with one more coat of Mod Podge.

The project was so fun, but also unnerving. I kept double checking my work to make sure I was putting the right papers on the right blocks!

Once all the blocks were done, I put them in the box, and the project started coming alive.

With the remaining space in the top of my box, I added the "S-E-A" letters, that adorable fishing tackle box, some paper images, pearls, bubbles, and a feisty crab sticker!


Even without a box, you can use wooden blocks for a project like this and display the blocks on a shelf.
You can see the whole video HERE.
Trust me on this -- you are going to want this kit! Head on over HERE and grab one while you can!
SEA you later,
Lolly
http://www.LollyPalooza.net
Wow!! Lolly!! That is a labour intensive project! But totally worth it. Love it!!
ReplyDeleteOMGoodness Lolly what a fun and gorgeous project you have created. This is a brilliant idea for all the blocks people with children have left lol xx
ReplyDelete